1. Intro
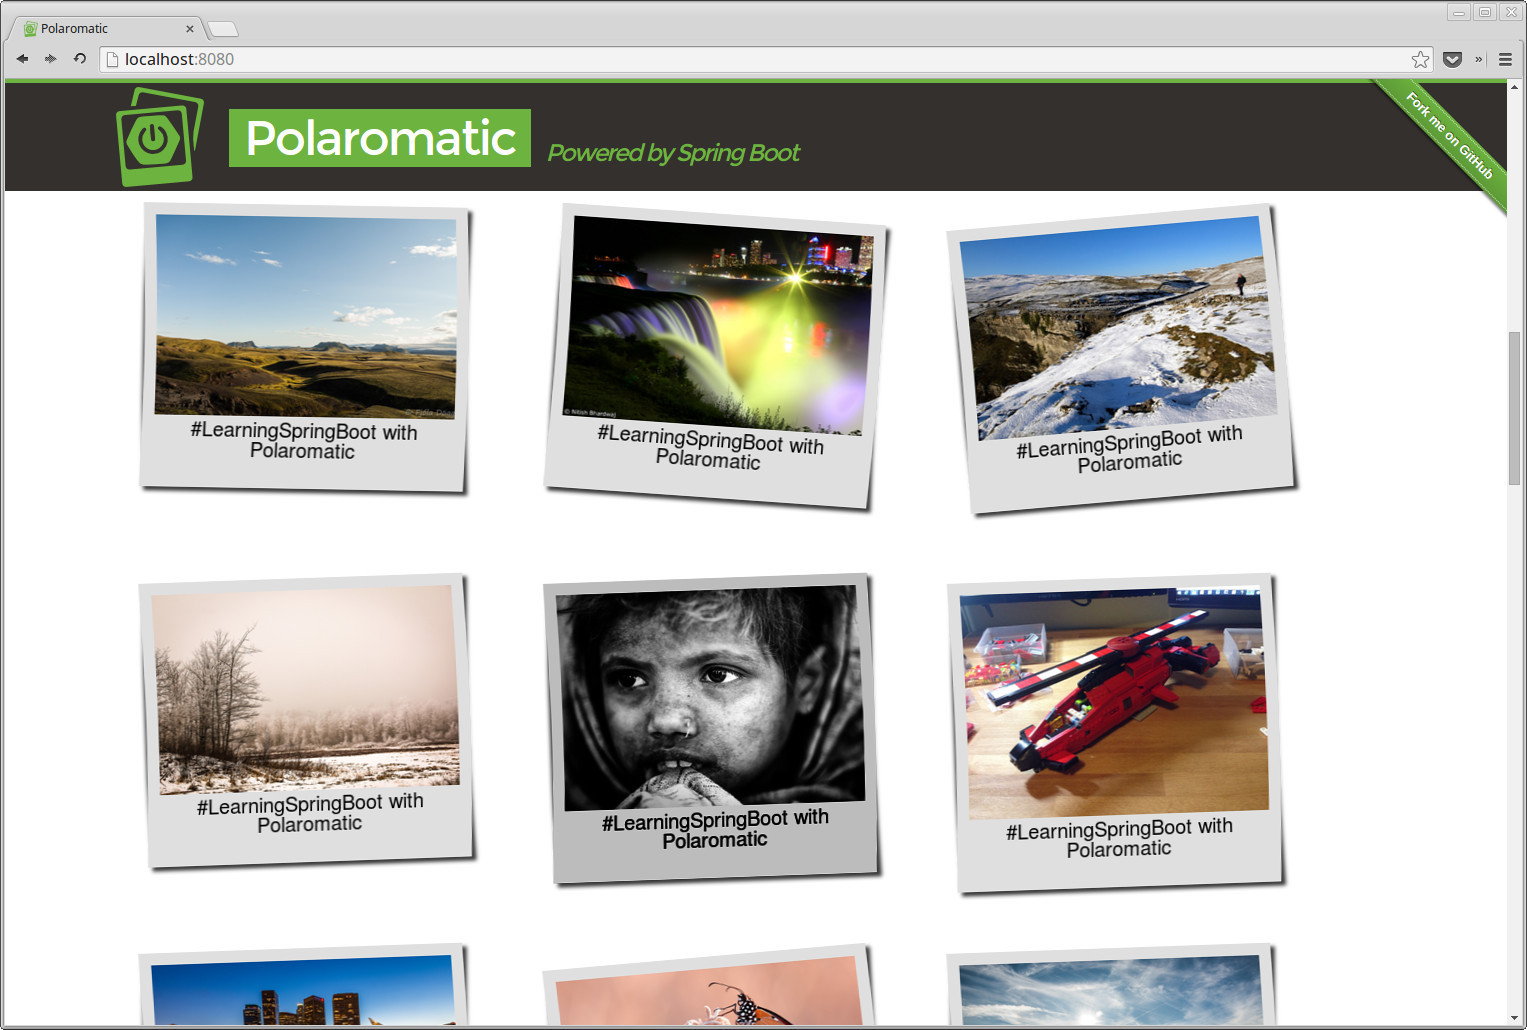
Polaromatic is a web application to show a photo wall in which photos appear automatically in the browser after applying a cool Polaroid effect.
This application has been created for the #LearningSpringBoot contest by Greg Turnquist and Polaromatic source code is available at my Github account: https://github.com/lmivan/contest.
| If you like the application please star-it on Github :-) |
1.1. Application flow
There are two different ways to send a photo to the wall:
-
The first one is to copy some photo files (*.jpg, *.png,…) in the work directory in the same level as the application.
-
The second one is to send a photo using the Android Share image with Polaromatic Application. If you use this method you can also customize the text in the Polaroid.
This flow is explained in detail in the following sections of the documentation.
-
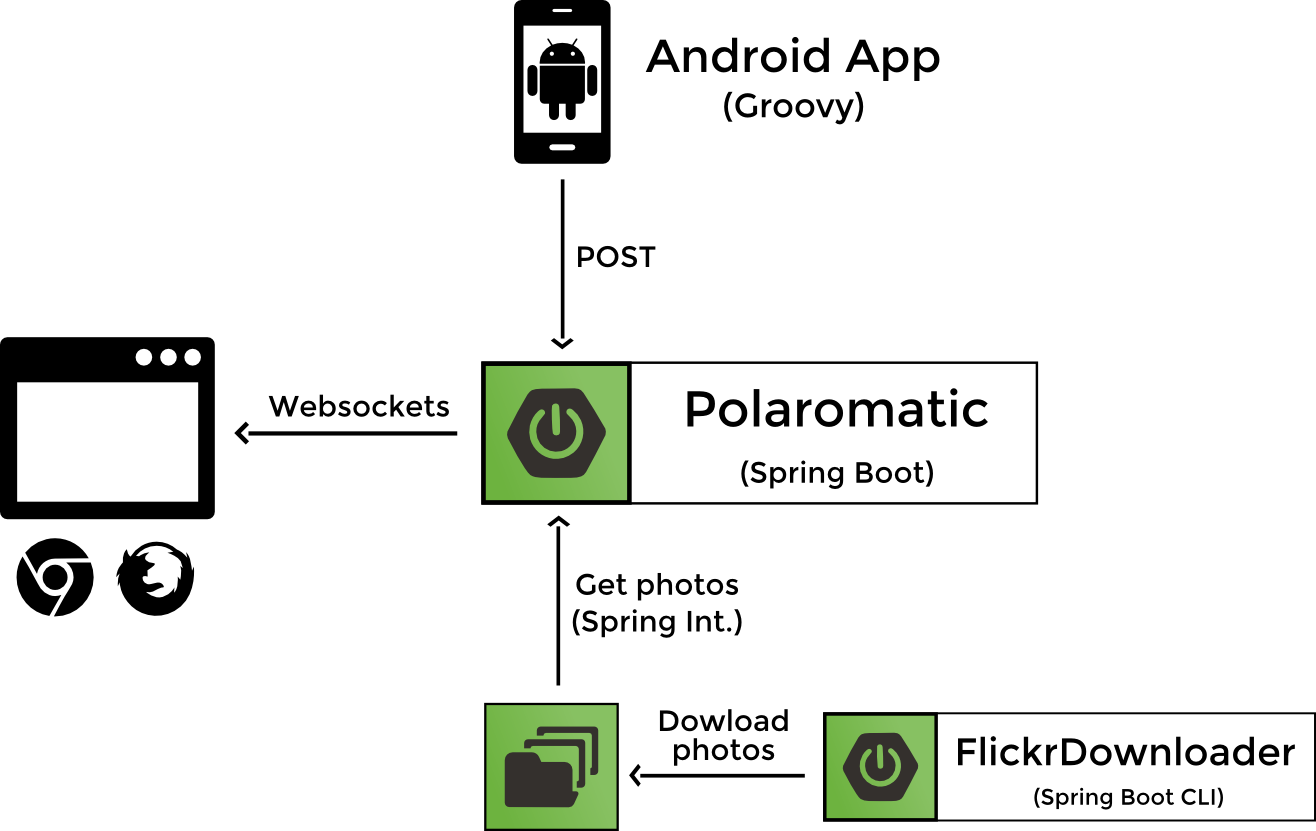
From a browser you connect to Polaromatic and just wait.
-
Then, if you just copy some photos into the work directory, they are processed by the Spring Integration flow inside the Polaromatic application, converted to a cool Polaroid photo with a text and finally pushed to the browser using Websockets.
-
A Flickr Interesing photos downloader as been created as a Spring Boot CLI Application to download automatically photos every 30 seconds.
-
The other way to publish photos is using the Polaromatic Android Application and share a photo using the application.
2. Live Demo
The application is deployed at http://polaromatic.noip.me/ and every 30 seconds new Flickr photos will appear automatically, so you only have to wait and enjoy :-)
You can also download the Android application and publish some photos from your mobile phone: https://www.dropbox.com/s/xholnkj5oz5tgx8/polaromatic-grooid.apk?dl=1
3. Backend
3.1. Spring Boot Application
The central part of the application is the Polaromatic App built with Spring Boot. We also use Spring Integration
to decouple the application from all the unnecessary boilerplate code needed to read files from the file system and to
define the flow of the information in the system.
From our application’s point of view we define a POGO that is going to be called by the infrastructure
(Spring Integration) and we are just going to receive a File.
To achieve this we use a File Inbound Channel Adapter from Spring Integration that is going to monitor a directory
(work) and for every file copied to that directory it’s going to send a message to the channel incommingFilesChannel
in which we define an integration flow.
<file:inbound-channel-adapter directory="work" channel="incommingFilesChannel"/> (1)

<chain input-channel="incommingFilesChannel">
    <service-activator ref="fileService" method="preprocessFile"/> (2)
    <service-activator ref="imageConverterService" method="applyEffect"/> (3)
    <service-activator ref="browserPushService" method="pushToBrowser"/> (4)
    <service-activator ref="metricsService" method="updateMetrics"/> (5)
    <service-activator ref="fileService" method="deleteTempFiles"/> (6)
</chain>| 1 | Define the integration with the file system |
| 2 | Preprocess the file received |
| 3 | Apply the Polaroid effect |
| 4 | Send the new photo to the browser using Websockets |
| 5 | Update the metrics |
| 6 | Delete all temporary files |
3.1.1. Custom metrics
Another cool thing about Spring Boot is that you can define you own custom metrics inside your application. As you can
see in the previous application flow, the step 5 is to update the metrics. We count the number of photos processed from
Flickr and from the Android application and expose this numbers in the /metrics endpoint.
You can check it using the demo environment: http://polaromatic.noip.me/metrics
{
    ...
    counter.polaromatized.photos.flickr: 152,
    counter.polaromatized.photos.android: 42,
    ...
}
3.2. Spring Boot CLI
We need to feed the system with nice photos to apply the Polaroid effect to them. We’ve chosen Flickr Interesing page to get the photos.
FlickrDownloader is a simple Spring Boot CLI application that downloads the photos from the page every 30 seconds
and copy them to the work directory to be processed by Polaromatic.
4. Android Application
While I was developing the backend I thought that it would be great to be able to take a photo with the phone an Polaromatize it. So I made the changes to the backend to be able to receive a photo and then I create an Android application to send the photo.
With this application you can take a picture with your phone, add the text you want and then share it with the Polaromatic web.
This is my first Android application and it has been fun to create it using Groovy.

| Please be sure to configure in the Settings option the url in which you have deployed your Polaromatic server or use the default demo environment. |
| The application is only a share-app so it is not shown in the applications list after you install it. |
5. Build and installation
If you want to install Polaromatic in your own server, make some changes to the code, test some new things,… you need to build it.
First please clone the repository (and if you like the project please star-it on Github):
git clone https://github.com/lmivan/contest.git
cd contest
5.1. Polaromatic
Polaromatic back is a standard Spring Boot application so the only thing you need to do is execute it:
./gradlew polaromatic-back:bootRunOr if your prefer you can build it and create an executable jar file:
./gradlew polaromatic-back:build| You need to have ImageMagick installed in your system to pass the tests and to apply the Polaroid effect (see below). |
Or just build the jar file without execute the tests:
./gradlew polaromatic-back:build -x test5.2. FlickDownloader
You need to install Spring Boot CLI. The easy way to do this is with GVM. Once you have it installed you can just run:
cd polaromatic-back
spring run FlickrDownloader.groovy
5.3. Android
If this is the first time you develop for Android or if you haven’t installed the Android SDK, the easy way to setup
everything is using Android Studio. Download, install it and then import
the polaromatic-grooid/build.gradle file as a Non-Android Studio project. This will download the necessary Sdk
files and Android build tools.
Once you have everything installed you can just set your android home and then build the .apk file (or just install it in your phone directly using Android Studio).
# Set your own path
export ANDROID_HOME=/home/ivan/Android/Sdk/

./gradlew polaromatic-grooid:build
5.4. Documentation
This documentation is created using AsciiDoctor. To build the documentation just execute:
./gradlew polaromatic-docs:asciidoctorThe documentation is available in polaromatic-docs/build/docs/html5/index.html
5.5. Dependencies
For the image conversion you need to have ImageMagick installed in your system. If you use Linux Mint/Debian/Ubuntu you only need to execute:
sudo apt-get install imagemagick5.6. Tips & Tricks
If you are not interested in developing the Android application and do not want to download and configure Android SDK
you can exclude the project from the Gradle build.
Edit setting.gradle and remove (or comment) the project polaromatic-grooid.
6. Technological stack
The technological stack of the Polaromatic applications has one thing in common: Groovy.
I’m a very big fan of Groovy so I used it for the whole stack :-)
-
Polaromatic: All the Spring Boot code is Groovy.
-
FlickrDownloader: A Spring Boot CLI Application can only be written with Groovy.
-
Android app: This is my first Android app, so the best way to built it is using Groovy now that it’s finally possible.
-
Tests: I use Spock for the Polaromatic tests.
-
HTML: The html of Polaromatic web is built with the new MarkupTemplateEngine introduced in Groovy 2.3.
-
Javascript: All the javascript is written in Groovy. Then the Groovy code is converted to Javascript using the amazing Grooscript project.
-
Build Tool: I’ve created a Gradle multi-project to build the different projects: back, grooid and documentation.